How to Create Customized Handmade Soaps at Home A DIY Guide

Understanding the Benefits of Handmade Soap
Engaging in the craft of soap making opens the door to a world of creativity and self-expression. By blending various ingredients and experimenting with techniques, individuals can create not only functional products but also works of art that enhance daily routines. The process of making soap, therefore, is as much about the journey as it is about the final product.
Why Make Your Own Soap?
There are several compelling reasons to consider diving into the realm of handmade soap:
- Personalization: One of the most enticing aspects of soap making is the creativity involved. You can experiment with different scents such as invigorating citrus, floral lavender, or warm vanilla. Additionally, you can play with colors using natural dyes like beet juice or spirulina, and add textures with ingredients like oatmeal or sea salt. This means each bar can truly reflect your personal style and preferences.
- Natural Ingredients: Achieving a formulation that is both skin-friendly and eco-conscious is simplified when you make your own soap. Many mass-produced soaps contain harsh chemicals and synthetic fragrances that can irritate sensitive skin. By choosing natural ingredients, such as coconut oil for moisture or shea butter for nourishment, you can rest assured that your soap is not only gentle but also beneficial for your skin.
- Unique Gifts: Handmade soaps are incredibly thoughtful gifts that convey care and creativity. Whether it’s for birthdays, holidays, or special occasions, a beautifully packaged bar of your handcrafted soap is a personal touch that is sure to be appreciated. Consider creating themed sets, such as seasonal scents or spa gift baskets that combine soap with bath bombs and scrubs.
Enhancing Your Soap with Beneficial Ingredients
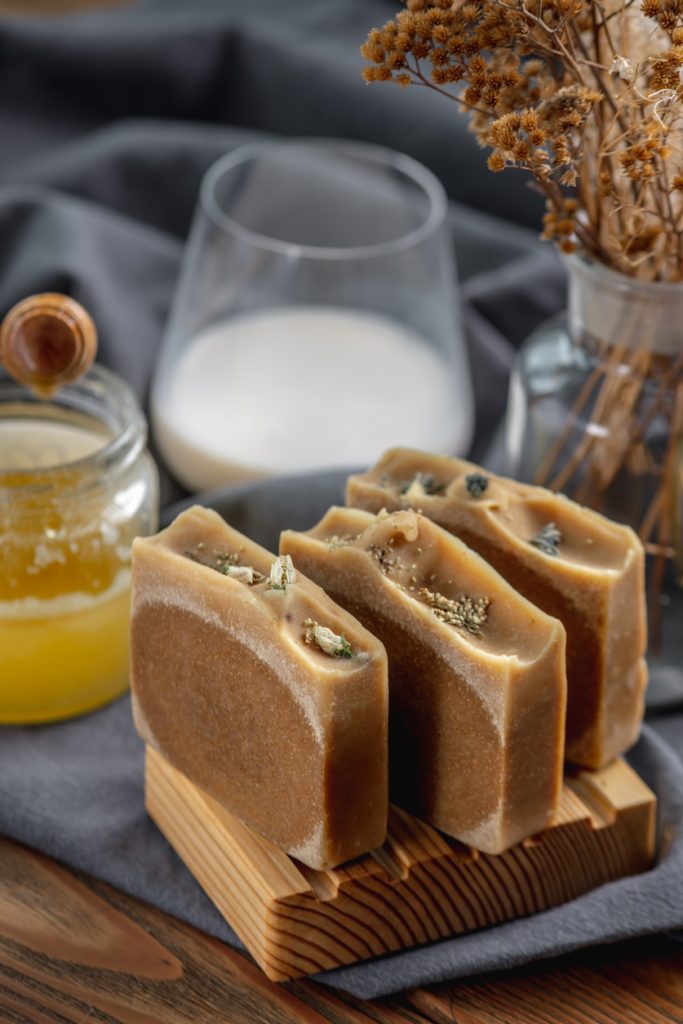
The customization options extend beyond scents and colors. You can infuse your soaps with beneficial ingredients that enhance skin health. For instance, consider incorporating essential oils known for their therapeutic properties—tea tree oil for acne-prone skin or eucalyptus for a refreshing twist. Exfoliants like ground coffee or dried herbs not only provide aesthetic appeal but can also deliver a gentle scrubbing action for a refreshing wash.
Getting Started with Soap Making
In this guide, you will embark on a step-by-step journey to learn the basics of soap making. From selecting the right base—whether it be melt-and-pour or cold process—to exploring various add-ins that align with your vision, the process will be thoroughly covered. You’ll find tips on safety precautions needed while handling lye, techniques to ensure that your soap sets properly, and creative ideas to package your soaps beautifully.
With an abundance of resources and communities dedicated to soap making, you’re not alone in this creative pursuit. Explore online forums, local workshops, or even social media groups where you can exchange ideas, troubleshoot issues, and share your successes. Prepare to transform your bathing ritual into a lavish experience that not only cleanses the body but also rejuvenates the spirit.

SEE ALSO: Click here to read another article
Gathering Your Supplies
Before diving into the exhilarating world of soap making, it’s crucial to gather all necessary supplies to ensure a smooth and enjoyable experience. Understanding what materials you need will help you stay organized and focused on the creative aspects of your project. The basic components can vary depending on the method you choose, but here’s a comprehensive list of essentials to get you started:
- Soap Base: For beginners, melt-and-pour soap bases are ideal because they save time and simplify the process. You can find natural glycerin, shea butter, or olive oil bases at craft stores or online. For those feeling adventurous, the cold process method allows you to create soap from scratch using oils and lye.
- Colorants: Add vibrancy to your creations with colorants specifically designed for soap making. Options include natural colorants from plant sources, such as turmeric for yellow or charcoal for a rich black hue.
- Fragrance and Essential Oils: Scent is a crucial aspect of any soap. Choose your favorite fragrance oils or essential oils to enhance the sensory experience. Keep in mind that essential oils provide added benefits, such as relaxing lavender or invigorating peppermint.
- Additives: You can incorporate various additives such as oatmeal, honey, or dried flowers for texture and added benefits. Think about what would feel good on your skin and elevate your soap’s appeal.
- Soap Molds: Molds come in various shapes and sizes, allowing for creative expressions. You can find silicone molds that are easy to work with, or even repurpose household items like muffin tins for unique shapes.
- Equipment: Ensure you have a **double boiler** or microwave-safe container for melting, as well as mixing spoons, a thermometer, and gloves for safety when necessary.
Safety First: Handling Ingredients
Understanding safety protocols is essential when making soap, particularly with the cold process method. If you opt for this, be aware that lye (sodium hydroxide) is a caustic substance that must be handled carefully. Always wear gloves, goggles, and work in a well-ventilated area. Ensure to follow the manufacturer’s instructions for mixing and never add water to lye—always add lye to water to prevent volcanic reactions.
Taking these precautions not only ensures your safety but also contributes to a more enjoyable soap-making adventure. Once you have your supplies ready and your safety measures set, you’re on your way to creating customized handmade soaps that reflect your unique personality and cater to your skin’s needs.
Exploring Recipes and Techniques
Now that you’re equipped with the right tools and safety information, the real fun begins! There are countless recipes available online ranging from simple designs to intricate artistic soap creations. You can choose to stick to classic recipes or let your imagination soar by creating unique blends that showcase your style. As you experiment and refine your techniques, you’ll build a repertoire of customized handmade soaps that can suit every occasion.
To dive deeper into the world of handmade soap crafting, let’s explore some essential techniques and ingredients that not only enhance your creations but also amplify their benefits. Understanding the various methods of soap making is critical for any DIY enthusiast—two of the most popular methods are the cold process and melt-and-pour techniques.
Cold Process Soap Making
The cold process method involves mixing oils with lye to initiate a chemical reaction known as saponification. This method allows for complete control over the ingredients, enabling you to customize your soap with natural oils, essential oils, and other additives. You can create unique blends tailored to specific skin types, ensuring a luxurious experience. With proper safety measures in place when handling lye, this technique can yield remarkable results.
Melt-and-Pour Technique
If you’re new to soap making, the melt-and-pour method is an excellent starting point. It involves melting a pre-made soap base and adding desired colors, fragrances, or exfoliants. This method allows for instant gratification without the need for complex procedures, making it an ideal choice for families and craft parties. The versatility of the melt-and-pour technique opens countless possibilities—infuse your soap with herbs, flowers, and natural colorants to create personalized products.
Essential Ingredients
Regardless of the method you choose, selecting high-quality ingredients is imperative. Natural butters like shea and cocoa not only provide moisture but also offer unique characteristics to your soaps. Additionally, incorporating botanical extracts and clays can enhance both the aesthetic appeal and skin benefits of your finished products. Be sure to research various combinations to discover what works best for your skin type and personal preferences.
Exploring Scents and Fragrances
Essential oils can elevate your soap-making experience, with various scents known for their therapeutic properties. Lavender, for example, is renowned for its calming effects, while citrus oils invigorate and energize. Experimenting with different combinations can turn a basic soap-making session into a fragrant adventure.
As you embark on this creative journey, remember that patience and practice are key to mastering the art of soap making. By exploring various methods and ingredients, you’ll not only cultivate your skills but also enjoy the delightful process of crafting customized handmade soaps.
| Advantages | Key Features |
|---|---|
| Customization | Create unique scents and ingredients tailored to your preferences. |
| Natural Ingredients | Utilize skin-friendly, organic components that suit every skin type. |
Exploring the art of handmade soap making not only enhances your creativity but also offers you the opportunity to provide personalized gifts or promote self-care. With the right techniques and ingredients, you can create beautiful, customized products that nourish both body and soul.
SEE ALSO: Click here to read another article
Mastering the Art of Soap Making
With your supplies organized and a solid understanding of safety procedures, it’s time to delve deeper into the techniques that will elevate your handmade soap-making skills. Mastering the art of soap making involves fine-tuning the processes and experimenting with various components to unleash your creativity. Here, we explore some popular soap-making methods and offer unique recipes that cater to different preferences.
Method 1: Melt and Pour
The melt-and-pour method is perhaps the most accessible way to begin your soap-making journey. It requires minimal equipment and offers instant gratification, as the soap can be used shortly after setting. Here’s a simple recipe to get you started:
- Ingredients: 1 lb of glycerin soap base, 2 tsp of essential oil (like lavender or eucalyptus), colorant as desired, and any additives (like dried flowers or oats).
- Instructions:
- Begin by chopping the glycerin soap base into small cubes for even melting.
- Melt the cubes in a double boiler or microwave until fully liquid, stirring frequently.
- Allow the melted soap to cool slightly before adding fragrance, colorants, and any optional additives.
- Pour the mixture into your chosen molds and let it sit for at least an hour to harden.
- Once firm, gently pop the soaps out of the molds and they are ready for use!
Method 2: Cold Process
The cold process method is perfect for those looking to explore the deeper chemistry of soap making. This technique allows for more control over the ingredients and produces a longer-lasting bar of soap. However, it requires a careful approach and precise measurements. Here’s a great recipe for beginners:
- Ingredients: 16 oz olive oil, 16 oz coconut oil, 16 oz palm oil, 12 oz distilled water, and 5.5 oz lye.
- Instructions:
- Begin by meticulously measuring the lye and water—never swap their quantities. Slowly add the lye to the water, avoiding direct contact with skin, and stir until dissolved.
- In a separate container, melt the coconut and palm oils, then mix in the olive oil.
- Once both the lye and oils are between 95°F and 105°F, combine them slowly while gently blending.
- Continue to mix until you achieve a light trace—a pudding-like consistency—and add your fragrance and any additives.
- Pour the soap mixture into a mold, cover it, and allow it to saponify for 24-48 hours before unmolding and cutting the soap.
Exploring Creative Additions
Once you’ve mastered the basic recipes, the possibilities for customized handmade soaps are endless. To make your soap stand out, consider integrating unique elements:
- Exfoliants: Use ingredients like ground coffee or poppy seeds for natural exfoliation.
- Botanicals: Incorporate herbs, such as rosemary or chamomile, for added benefits and visual appeal.
- Swirls and Layers: Experiment with swirling colors or layering techniques to create visually stunning designs.
As you explore the different methods and ingredients available in the soap-making arena, don’t hesitate to document your creations and fine-tune your recipes. Whether you opt for traditional scents or adventurous blends, each batch will showcase your unique touch, turning an everyday shower into a luxurious self-care experience.
CHECK OUT: Click here to explore more
Conclusion: Embrace Your Creativity in Soap Making
Creating customized handmade soaps at home is not only a delightful pastime, but it also opens doors to self-expression and creativity. Whether you prefer the simplicity of the melt-and-pour method or the intricate artistry of cold-process soap making, the opportunity to experiment with various ingredients allows you to design soaps uniquely suited to your personal taste. As you immerse yourself in this craft, you’ll find that the addition of natural colorants, exfoliants, and botanicals can transform standard bars into stunning creations that reflect both your style and values.
Beyond the joy of making soap, there’s also a deeper connection to sustainability and self-care. By selecting organic and natural components, you minimize waste and avoid harsh chemicals often found in commercial products, ensuring your skin receives the gentle care it deserves. Plus, gifting handmade soaps is a thoughtful way to share your artistry with friends and family, making every occasion a bit more special.
As you embark on this enchanting journey of soap making, document your adventures and don’t shy away from making mistakes—the most innovative designs often stem from happy accidents. With practice and patience, you’ll not only enhance your skills but also cultivate a rewarding hobby that resonates with the spirit of craftsmanship. Now is the perfect time to gather your materials, unleash your imagination, and dive into the world of homemade soap crafting. Happy soap making!


